MyITLab
MyITLab is an on-line content delivery product from Pearson Education, the parent company of several publishing lists, including Prentice-Hall Publishing from which the textbooks were adopted for CIS 2, Introduction to Computing. Although it is a web-based delivery vehicle, MyITLab requires some system set-up, including downloading and installing some program code and related data that is used by MyITLab when you access the web pages for tutorials, training, and testing. Please read the following paragraphs carefully BEFORE you attempt to install and set up your MyITLab environment on your own computer. It is important to do it right so that your experience is as good as possible. There's a lot to read here, but please read it before starting to install MyITLab.
Getting Started:
To set up and use MyITLab, you must have:
- a Student Access Code: if you purchased the textbook bundle for the CIS 2 course, you have a folder for MyITLab, Exploring Office 2007. Inside this folder are set up instructions and, very importantly, your Student Access Code, or "registration key." This is a one-time only registration key; once used, it cannot be reused or reassigned. Please DO NOT attempt to follow the set up instructions nor use this registration key until you have read all of the information on this web page.
- your E-Mail Address: you must have a valid e-mail address to use the MyITLab system. The "best practice" for this is to use the exact same e-mail address you used when registering as a student at West Valley College, and that address will be the same as recorded within Angel. You will also be asked by me to use your e-mail address as your MyITLab user name, unless you already have a Pearson Education on-line account for another product, in which case you may want to use that user name.
- the MyITLab Course ID: your course ID will be provided within Angel; you will first need to log in to your Angel account and then go to the Lessons tab to retreive the appropriate course ID for the current semester.
System Requirements:
MyITLab will be installed on your own computing system, or on one that you will be using during this course. MyITLab requires Microsoft Windows; MyITLab DOES NOT RUN on Apple Macintosh computers unless you first install Windows in either a dual-boot or Virtual Machine configuration. Detailed System Requirements are listed on the MyITLab System Requirements page. The basic/recommended system requirements include:
- Operating System: Microsoft Windows XP, SP2; or Microsoft Vista, SP1 or SP2.
- Processor (CPU): 2.0GHz
- Memory (RAM): 2GB (1GB minimum)
- Display: 1024 x 768 pixel resolution
- Browser: Microsoft Internet Explorer (IE) version 7. (IE ver 8 is NOT supported, nor are alternative browsers such as Firefox, etc.)
Configuring Internet Explorer:
Although your browser may be correctly configured to use MyITLab, you should check.
- Start your browser, click Tools. You should turn off Pop-Up Blocker. MyITLabs uses quite a few pop-up windows, and having the pop-up blocker on simply makes it frustrating. You can, of course, configure Internet Explorer to allow pop-ups for MyITLab, but the problem is that the system does not use a single server address - there are several - and I have found it nearly impossible to make certain to set every one that is used; thus, I set pop-up blocking OFF.
- Again in the Tools menu, click Internet Options. You need to allow ActiveX elements to be installed and run in your browser, and that is configured in the Internet Options dialog box.
Installing MyITLab
Using the MyITLab Wizard
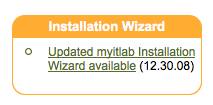
Presuming you have read the MyITLab system information on this page, and perhaps on the MyITLab Systems Requirements page, you should be ready to download and install the MyITLab software on your own computer. Pearson Education provides an installation Wizard to simplify this process but, typically, "simplify" is one of those very subjective terms - there are things you should know. Read the following before launching the wizard; knowing what to expect and planning what to do are keys to doing it well.
Note: You must have Administrator rights to your system in order to install MyITLab.
 |
Before you begin using MyITLab, before you even create your MyITLab user account, you should install the MyITLab software and support plug-ins for Internet Explorer. The set up is automated, but there are some things you can do to make the installation easier. |
Creating your MyITLab Account
After you have completed the MyITLab installation, it is time to set up your MyITLab user account. This is when you will need to have you MyITLab Student Access Code, your e-mail address, and the MyITLab Course ID. If you purchased the book bundle from the campus bookstore, you will find the Student Access Code in the MyITLab folder, under a pull-off tab inside the front cover. If you do not have that folder, you may purchase the Student Access Code during the account creation process, using a credit card. The Course ID will be shown within Angel on the Lesson tab. Look this up before you create the account to facilitate the process, although this step can be completed later.
First-Time Login:
 |
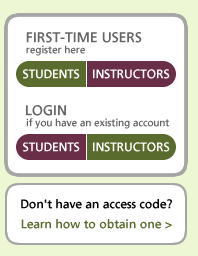
When you are first setting up your MyITLab user account, you click on the green STUDENTS button under FIRST-TIME USERS in order to create your user account and register your Student Access Code. Once you've created your account, you will use the red STUDENTS button under LOGIN. If you do not have your access code, you should click the link "Learn how to obtain one>" beneath the login buttons. Following that link will step you through a credit-card purchase process and then lead to a process similar to the steps below for users with an Access Code - the difference being that you will not need to enter your code as it was automatically linked into the process. Click on this link to create your MyITLab by logging in for the first time. |
 J. Patrick Fenton, CIS Dept., West Valley College